(**Press Sample**)
Happy new year my beauties!!!
If you follow LTHP on Facebook, you may have seen a post about some blogging goals I have for this new year. One of those goals is to master the art of glequin placement. I have a huge level of admiration and respect for the amazing nail artists who have mastered this technique. While glitter placement isn't necessarily hard, it is very time consuming. Glitter placement requires a lot of patience, a steady hand and precision. The finished looks are always beautiful and eye-catching. In the spirit of the new year and sticking to my goals, I jumped right into this glequin gradient manicure. The placement isn't precise on all my nails, and I could definitely use some practice... but I do love this look so much!
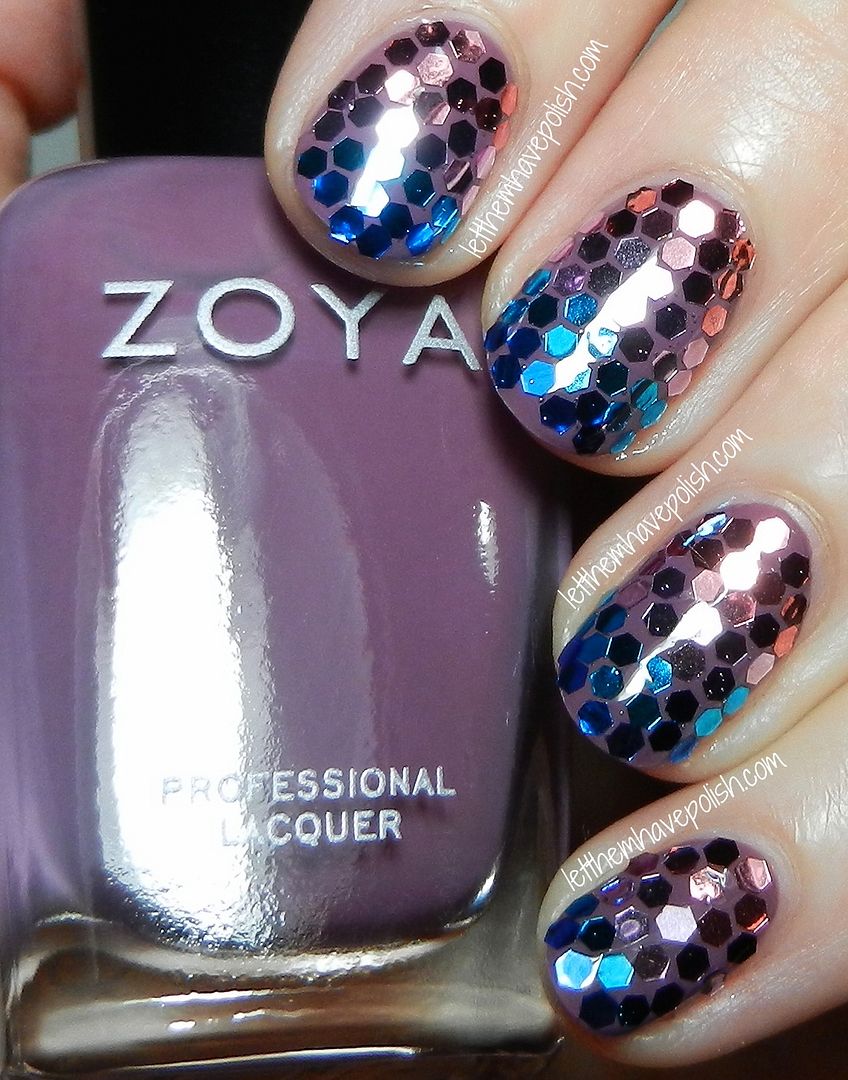
For this glequin gradient I started with a base of Zoya Odette. Once my base color was fully dry I started working on the loose glitter placement. I did a coat of a slow drying base coat over my dry base color and set the glitter onto that. I forget where I got my glequins from, I want to say it was Born Pretty Store. They definitely have an AMAZING range of loose nail art glitter. For my gradient I used a Rosy Pink glitter, a light Lilac glitter, a Sky Blue glitter and a Cobalt Blue glitter. To finish the look off and smooth out the surface I did Two coats of Seche Vite top coat.
While I am not 100% happy with my placement, I do like the finished look. From further away the mistakes in my placement were not as obvious. I will admit, this was rather time consuming, but therapeutic in a sense. I highly recommend that you guys visit [THIS BLOG] for impressive examples of glitter placement manicures.
Happy 2014 and thank you for stopping by!
